Last updated on 2024-04-28, by
How to Change Language on Disney Plus?
Many of you have heard and watched Disney movies. The Walt Disney Company is a famous Hollywood company and is famous for its cartoon characters such as Mickey Mouse, Donald Duck, Goofy and Snow White. Disney Plus is a platform which has the digital copyrights of Disney and could play Disney movies and TV shows. It is a famous platform around the world and supports a variety of languages for various regions and countries. But how to change language on Disney Plus? You’ll know how to do it after reading this article.
Menu
Part 1: How to change UI language on Disney Plus?
Let us first talk about how to change UI language on Disney Plus, including in the profile settings, on Android/iPhone, on Fire TV, on Android devices and on website.
1. Change UI language on Disney Plus in the profile settings
There are also several simple steps to illustrate how to change UI language on Disney Plus in the profile settings. The steps are applicable to Disney Plus app and its website on the desktop.
1. Launch Disney Plus app or open the website of Disney Plus on your browser.
2. Click the “My Profile” button in the upper right corner of the screen.
3. Then click “Edit Profiles” button in the pop-up interface of settings.
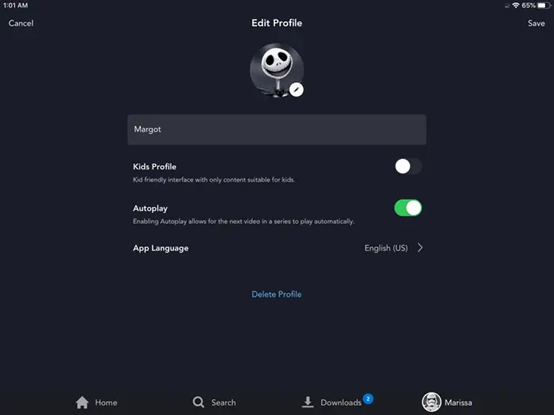
4. Click the pencil icon of the profile that you want to change.
5. Click the “App Language” button and you could select language you prefer in the dropdown of “App Language”.
6. After finishing selecting the language you could click “SAVE” button at the middle bottom of the screen to save all the settings.
2. Change UI language of Disney Plus on Android/iPhone
1. Open Disney Plus app on your mobile phone.
2. Click the button at the bottom right corner and enter the settings page. Choose a profile and click “EDIT PROFILES” to edit profile.
3. Then you will enter the page of editing profile. Click “App Language” option.
4. You could select language in the “App Language” page. Just select any language you prefer.
3. Change UI language of Disney Plus on Fire TV
1. You could find the “Settings” option on your Fire TV first.
2. Select “Preferences” to set the language.
3. You could change the language in the “Preference” page.
Part 2: How to change playback language on Disney Plus?
In the last part, you’ve learnt the specific steps on how to change UI language on Disney Plus in different devices. And in this part, I will illustrate how to change playback language on Disney Plus.
1. Change playback language on Disney Plus within the show or movie settings
There are several simple steps to illustrate how to change playback language on Disney Plus within the show or movie settings.
1. Launch Disney Plus app or open the website of Disney Plus on your browser.
2. Choose and click the movie or TV show that you want to watch.
3. While the movie or TV show is playing, please pause it before clicking the Settings icon (it looks like a tiny screen with keys) in the upper right corner of the screen.
4. You will enter the window with two columns opened, and they are “Audio” and “Subtitles” respectively. Therefore, you could select the audio track you desire in the left “Audio” options and the subtitle you prefer in the right “Subtitles” options. If you are not willing to use subtitles, you could select “Off” option.
5. After finishing setting audio track and subtitle, you could close the window by clicking × icon in the upper right corner of the screen.
Note
- Note: The steps above only apply for language change of the specific movie or TV show. As a result, if you have multiple movies or TV shows, you need to repeat the steps to change their language settings.
2. Change playback language on Disney Plus on Roku TV
1. Start watching a movie or TV show on Disney Plus on Roku TV
2. You could press the “Star” button on your Roku remote and select the “Audio” menu.
3. Then you could select the language you prefer from the “Audio” option in the upper left corner of the screen.
3. Change playback language on Disney Plus on Apple TV
1. Choose Disney TV channel on your Apple TV and choose a movie or TV show to watch.
2. You could swipe down on your Apple TV remote and until you find “Audio” option.
3. Choose “Audio” option at the top of the screen and you could select the language you prefer.
Above all, these are specific steps to change the playback language on Disney Plus on different devices. These detailed and practical steps may help you a lot on how to change playback language on Disney Plus.
Part 3: How to download Disney Plus content with CleverGet?
CleverGet Disney Plus Downloader, as the best Disney Plus downloader, could download Disney Plus movies and series with multi-language subtitles and audio tracks on PC for offline viewing. It allows you to download video from Disney Plus streaming service in simple clicks. The high downloading quality allows you to download up to 720P Disney movies or series at high quality. And this part is about detailed steps which shows you how to download Disney Plus content with CleverGet.

-
CleverGet All-In-One
– Enable users to download online videos/live streams from 1000+ sites easily at high speed.
– Download 8K video and 320 kbps audio without quality loss.
– Download TV series episodes of all/certain seasons at once.
– Save downloaded online videos to MP4/MKV/WEBM format.
Step 1: Download and install CleverGet
You should download and install CleverGet Disney Plus Downloader on your computer at first. And you should make sure you have downloaded and installed the right version according to your computer system.
Note: CleverGet Disney Plus Downloader is a component of CleverGet program.
Step 2: Set output directory
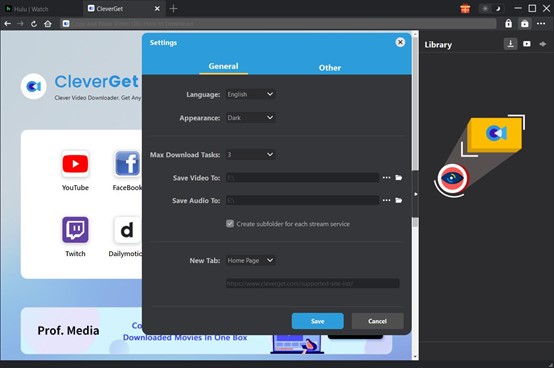
You should set output directory firstly before downloading videos from Disney Plus so as to find the videos you downloaded from Disney Plus easily. Click the three-dot icon and then you could set output directory in the pop-up “Settings” panel after clicking the “Settings” button from the drop-down menu. You could choose the directory in the “Save Video To” or “Save Audio To” box. At last, click “Save” button to save all the settings.
Step 3: Search for target video
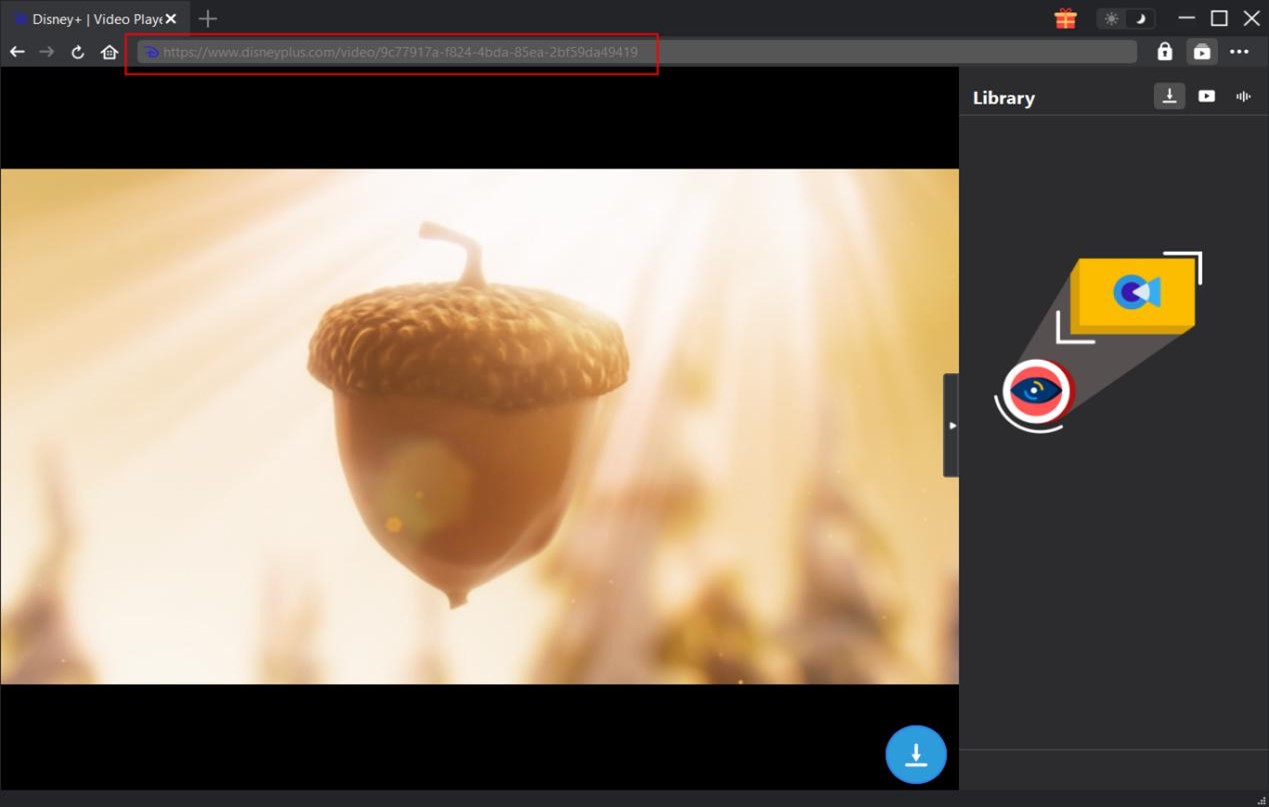
After entering the main interface of Disney Plus, just input the movie name you would like to watch on search box at the upper right corner. You could also directly copy and paste Disney Plus video URL into the address bar to open, play and download Disney Plus video within CleverGet. CleverGet allows you to log into Disney Plus with your own account and password.
Step 4: Select video and download
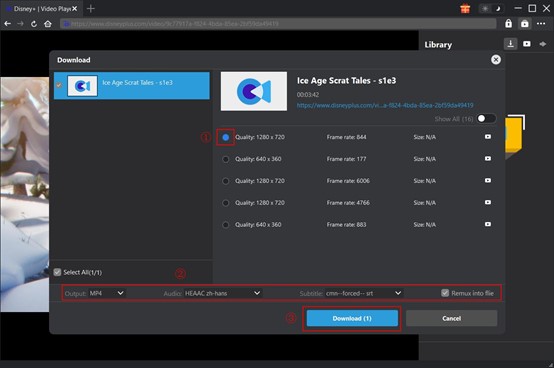
Click the download icon at the bottom right corner on the playback interface. And then CleverGet could analyze video URL automatically. Then you could select the episodes that you want to download on the “Disney Plus Downloader” interface after the system finished analyzing video URL. You could select the episodes at will, and then you could click episodes to add them to the download queue. If you need to download all seasons of the videos, you could just click “Select All” button to download all of them, which could save you a lot of time without clicking them one by one. You could click all episodes of the movie or TV show you choose or click several options to add them to the download queue. At the same time, you could choose output format, subtitle, quality and audio track at the bottom of “Disney Plus Downloader” interface. You could also decide whether to remux into video, which means the videos you will download are combined with selected subtitle if you choose it. Otherwise, subtitle is saved in separate file. After that, click the blue “Download” button to start downloading.
Step 5: Check downloading process
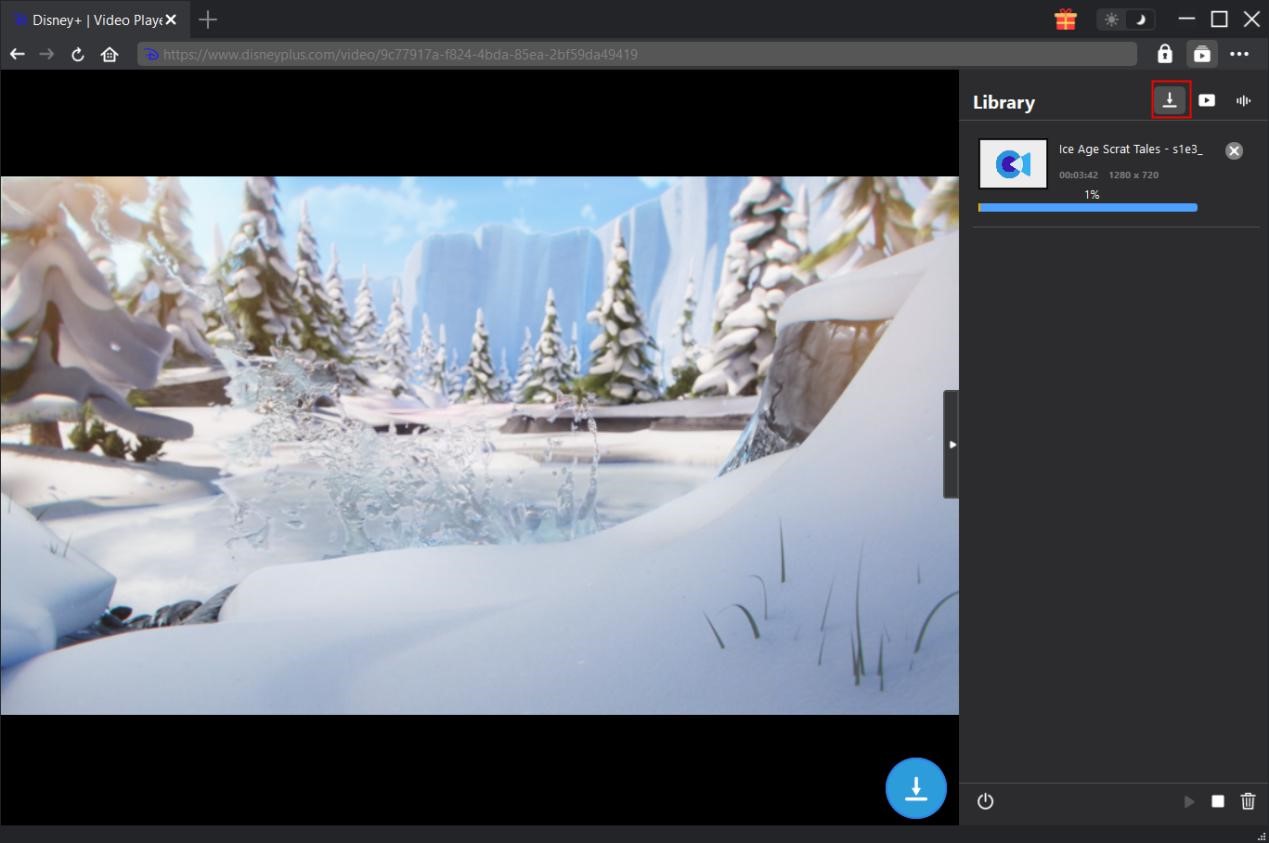
You could check out the videos you are downloading right now on the right sidebar. And you could pause the download, end the download or even re-download the videos.
Step 6: Check downloaded file
When the downloader finishes downloading, it will automatically open the downloaded panel. You could click “Play” button on the thumbnail of downloaded file to play it or click “Open Folder” to open file in its exact location. Right click to play it with Leawo Blu-ray Player, delete it, delete all downloaded tasks or open source web page.
Above all, these are specific and detailed steps on how to download Disney Plus content with CleverGet. What’s more, you could download OnlyFans content and even download YouTube content with CleverGet.
Part 4: FAQs
1. Why is English audio not working on Disney Plus?
A: Make sure that you’ve correctly enabled audio, captions, and subtitles in the Disney+ app. Check your device’s accessibility settings (if applicable). Test other videos for comparison purposes.
2. Why are my Disney Plus movies playing in Spanish?
A: Language Settings: It’s possible that your language settings are set to Spanish by default. You can check your settings to see if this is the case and change them to English or another language if needed.
3. What languages are available in the Disney Plus?
A: Czech, Danish, Dutch, English (UK and US), Finnish, French (Canada and France), German, Greek, Hungarian, Italian, Japanese, Korean, Norwegian, Polish, Portuguese (Brazil and Portugal), Romanian, Slovak, Spanish (Latin America and Spain), Swedish, Turkish, Chinese (Simplified), Chinese (Traditional), Chinese (Hong Kong).
4. Why is my Disney Plus playing in another language?
A: Once your movie or show starts streaming, a box icon will appear on the upper right side of the screen and the player UI. Click it. You will see the language selection menu. Use that to choose your desired language and subtitle options.

